
I'm Alex Kearney, I'm Science at the University of Alberta. I focus on Artificial Intelligence and Epistemology.
I'm Alex Kearney, I'm Science at the University of Alberta. I focus on Artificial Intelligence and Epistemology.
I went to another workshop at Fern's school of craft! Ash Alberg from the pembina fiber-shed taught to courses focused on using natural materials to dye and print on fabric.
The first course was on eco-printing. Unlike dying, eco-printing is creating a surface print of some source materials--typically plants--on a target material. It's like using a printing press, but involves a chemical transfer between plants and some protein or cellulose based material. For this course, we worked with cotton tea-towels and silk scarves, however, you can print on all sorts of materials, including wood, wool, and leather.
This post is a collection of my notes from the class.
Before you can begin dying or printing, the material must be prepared. Oils and debris accumulate on fabrics. These oils can be on both new fabric as result of initial processing of the materials, or on second-hand materials from use. It's important to remove the oils, as they create a resist--- a section in the fabric where dyes and prints cannot transfer. We remove the oils by scouring the material.
Ash mentioned two detergents for scouring:
For textiles, it's best to throw the material in the wash on the cycle you expect to use to clean the end-product.
Once the materials have been scoured, we pre-mordant them. A mordant is a substance used to cure and fix dye or stain to a textile. For cellulose-based materials we use sources of tannins as our pre-mordant; for protein-based materials we use metal-ion based mordants.
Tannins can be found in rhubarb leaves; however, rhubarb leaves are toxic. If you're extracting tannins from rhubarb, make sure your workspace is well ventilated!
To pre-mordant, we weigh an appropriate amount of mordant based on the weight of the material we are treating, place it in a pot with our material on low heat, and leave it for an hour or two.
Alum is one of the most common pre-mordant to use with protein-based materials, and it's safe to use. You should use 15-20% of the fibre weight in alum for mordant.
After your materials as scoured and mordanted, it's time to print!
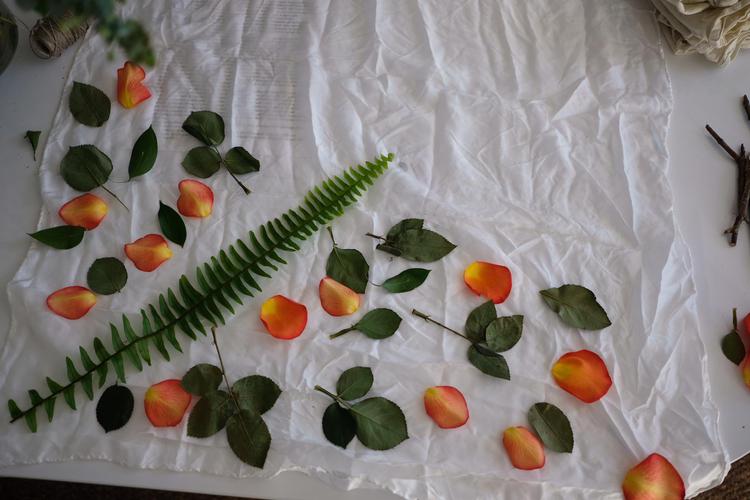
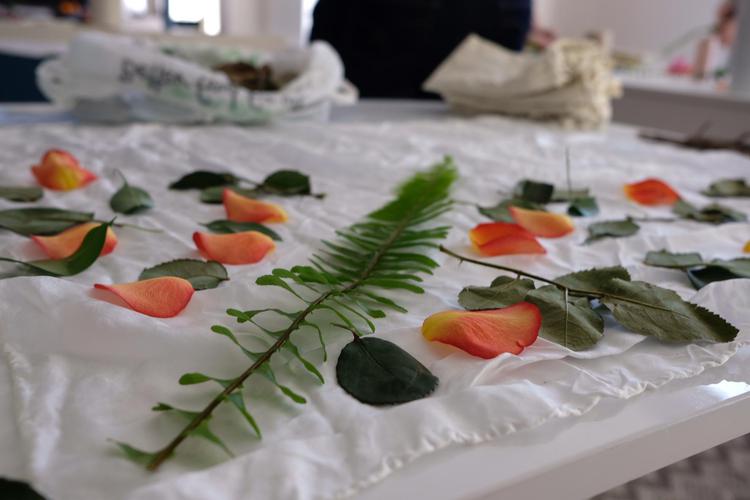
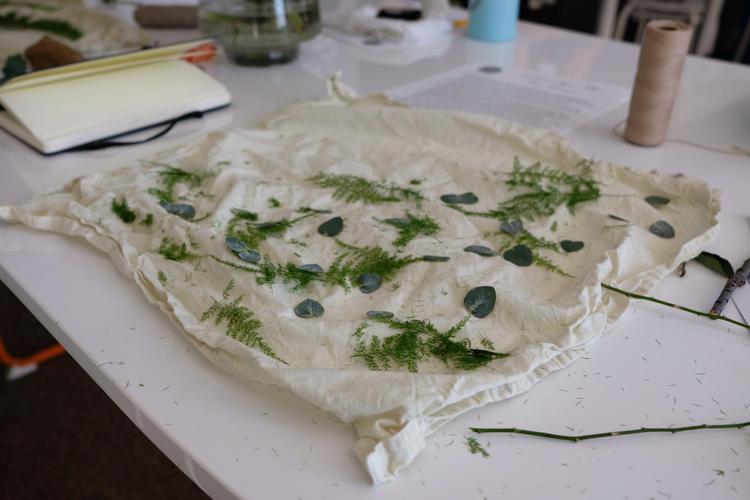
At the workshop there were a few bouquets for us to dismember and scatter onto our projects. One thing to remember when eco-printing: just because a plant has a particular colour, doesn't mean that it's going to imprint in that particular colour.
Although eucalyptus is a pretty teal-green, it leaves behind a purple impression. Similarly, the rose petals and leaves left behind colours ranging from black-brown to green.
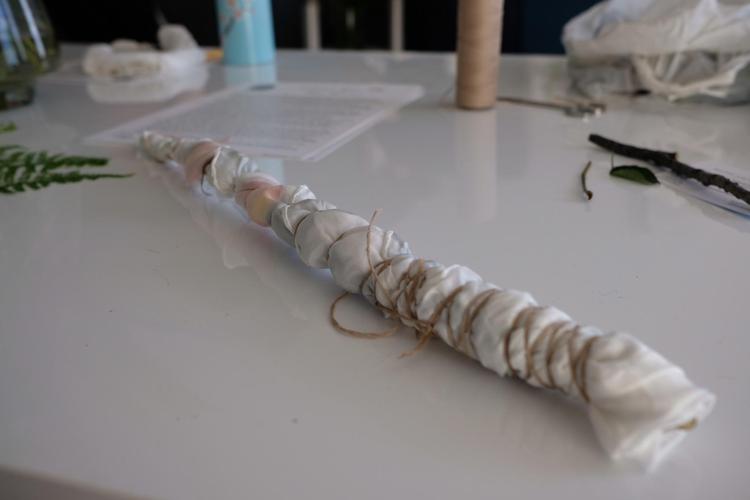
Once the pieces are in place, there's a number of different ways to leave an impression.
You have to wrap your bundles really tight. No, seriously. If you want your impression to come out, you need to apply substantial pressure. The way you do that is by tightening your bundle and tying it down. It's easy to think that you're bundle is tight enough. You can be oh-so wrong. One of the issues during the workshop was that few people got substantial impressions onto their work. A few people had barely any impression on their work.
This could have been for two reasons: 1) the bundles weren't left in the pots long enough due to time-constraints, or 2) the people's bundles weren't tight enough. Given everyone's bundles were on the stove for roughly the same amount of time, and some of us got striking impressions, my money is on 2).
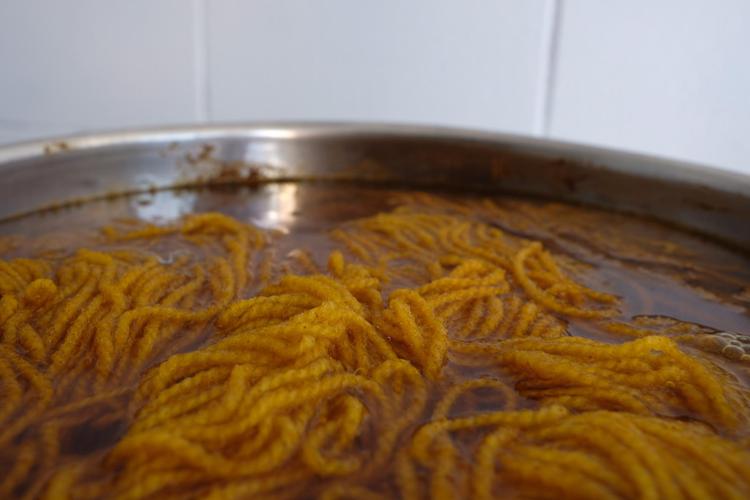
After the bundles are snug, it's time to give them a bath. Bundles need to be simmered at a medium heat below boiling for a few hours. To give my prints a little extra kick, I brought them home and put them in a slow cooker over-night.
Never use anything to store or cook food that you use for dying and printing. It's important to keep your food-prep and dye-related tools separated. Just because it came from a plant, doesn't mean that it's healthy to consume.
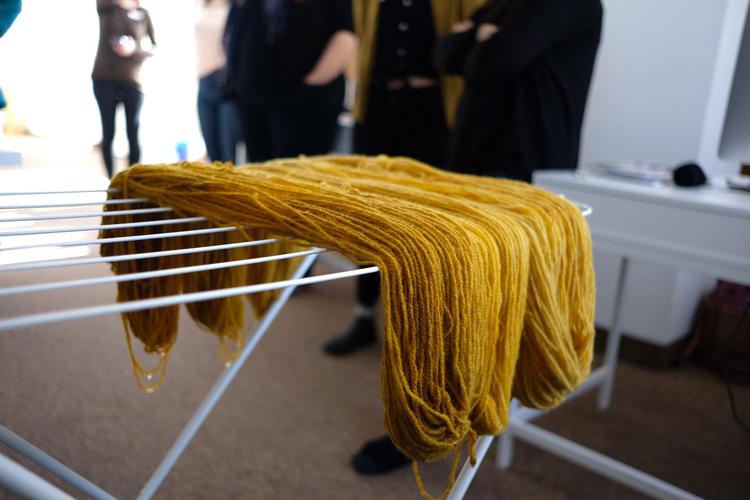
I was happy with how my scarf turned out after a little extra time cooking, but I felt that I could improve it a little bit more. by adding a little bit more pressure to my bundle, and by giving it a little bit more time. Because eco-printing is transfer, not a dye, you can keep re-printing on the fabric to experiment.
Online Suppliers: Maiwa: for natural dyes and fabric. Richter's Seeds: for seeds.
I went to another workshop at Fern's school of craft! Ash Alberg from the pembina fiber-shed taught to courses focused on using natural materials to dye and print on fabric.
The first course was on eco-printing. Unlike dying, eco-printing is creating a surface print of some source materials--typically plants--on a target material. It's like using a printing press, but involves a chemical transfer between plants and some protein or cellulose based material. For this course, we worked with cotton tea-towels and silk scarves, however, you can print on all sorts of materials, including wood, wool, and leather.
This post is a collection of my notes from the class.
Before you can begin dying or printing, the material must be prepared. Oils and debris accumulate on fabrics. These oils can be on both new fabric as result of initial processing of the materials, or on second-hand materials from use. It's important to remove the oils, as they create a resist--- a section in the fabric where dyes and prints cannot transfer. We remove the oils by scouring the material.
Ash mentioned two detergents for scouring:
For textiles, it's best to throw the material in the wash on the cycle you expect to use to clean the end-product.
Once the materials have been scoured, we pre-mordant them. A mordant is a substance used to cure and fix dye or stain to a textile. For cellulose-based materials we use sources of tannins as our pre-mordant; for protein-based materials we use metal-ion based mordants.
Tannins can be found in rhubarb leaves; however, rhubarb leaves are toxic. If you're extracting tannins from rhubarb, make sure your workspace is well ventilated!
To pre-mordant, we weigh an appropriate amount of mordant based on the weight of the material we are treating, place it in a pot with our material on low heat, and leave it for an hour or two.
Alum is one of the most common pre-mordant to use with protein-based materials, and it's safe to use. You should use 15-20% of the fibre weight in alum for mordant.
After your materials as scoured and mordanted, it's time to print!
At the workshop there were a few bouquets for us to dismember and scatter onto our projects. One thing to remember when eco-printing: just because a plant has a particular colour, doesn't mean that it's going to imprint in that particular colour.
Although eucalyptus is a pretty teal-green, it leaves behind a purple impression. Similarly, the rose petals and leaves left behind colours ranging from black-brown to green.
Once the pieces are in place, there's a number of different ways to leave an impression.
You have to wrap your bundles really tight. No, seriously. If you want your impression to come out, you need to apply substantial pressure. The way you do that is by tightening your bundle and tying it down. It's easy to think that you're bundle is tight enough. You can be oh-so wrong. One of the issues during the workshop was that few people got substantial impressions onto their work. A few people had barely any impression on their work.
This could have been for two reasons: 1) the bundles weren't left in the pots long enough due to time-constraints, or 2) the people's bundles weren't tight enough. Given everyone's bundles were on the stove for roughly the same amount of time, and some of us got striking impressions, my money is on 2).
After the bundles are snug, it's time to give them a bath. Bundles need to be simmered at a medium heat below boiling for a few hours. To give my prints a little extra kick, I brought them home and put them in a slow cooker over-night.
Never use anything to store or cook food that you use for dying and printing. It's important to keep your food-prep and dye-related tools separated. Just because it came from a plant, doesn't mean that it's healthy to consume.
I was happy with how my scarf turned out after a little extra time cooking, but I felt that I could improve it a little bit more. by adding a little bit more pressure to my bundle, and by giving it a little bit more time. Because eco-printing is transfer, not a dye, you can keep re-printing on the fabric to experiment.
Online Suppliers: Maiwa: for natural dyes and fabric. Richter's Seeds: for seeds.